The Launch Guide was created to help guide creators through the survey setup process. Following the Launch Guide will help ensure that your surveys are setup properly to collect the information needed for fulfillment. Since you know your project details best, it's up to you to make sure you've addressed any unique situations that came up during the campaign. Below you'll find an overview on how to access and use the Launch Guide. If additional help is needed our Help Center (click here) includes a section with articles specifically related to the Launch Guide.
Accessing the Launch Guide
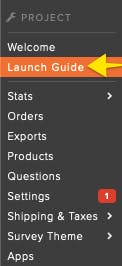
Once your project is imported to our system, and you've accepted the login invite and created your password it'll be time to get started on your survey setup. Upon logging into our system and selecting your project, you'll find the Launch Guide listed at the top of the left menu.
Understanding the Launch Guide
When each section of the Launch Guide is complete you'll see a green check mark. Be sure to click the check-box (when available) upon completing each step. To the far right of each step, you'll see a green "Do It!" "Review It!" link. Clicking those links will take you to the associated section within your campaign.
Your project 'Project Name' has been created - This confirms that your account has been created, giving you access to the system. This step is completed for you.
Your Kickstarter campaign stats, information, and reward levels have been imported - Once your campaign has ended, your project details will be imported. This includes your reward levels and overall campaign stats. This step is completed for you.
Authorize Crowd Oxto import your Kickstarter/Indiegogo backers - This is a critical step to getting your backer information into the system. Authorizing Crowd Ox simply gives us access to receive the backer and pledge data, by adding us a collaborator. In this step, the "Do It" link will take you to a Help Doc with more details about connecting your Kickstarter account. Be sure to click the checkbox once you've completed this step.
Add support email - An email address to reach your support team is required. After backer support ends, any backer emails to your project will be redirected to the email address entered here.
Add products that you will fulfill to your supporters - An essential step in your survey setup is the product. Here you'll want to create a product for every item the backers will receive, both reward level and extras. A price and shipping is only necessary on products that will be offered as Extras to backers to add-on during the survey. A green check mark will appear when you have created a product. Please continue to revisit this section until all of the necessary products have been created.
Add marketing questions - If you plan to ask a few marketing questions, here is the step to add them in. Marketing questions are commonly "Have you pledged previous projects" and "Would you like to be added to the project newsletter". Not all projects will find a need for this section. Whether or not marketing questions are added, be sure to click the checkbox once you've completed this step.
Map products and questions to configurations- Once the products and marketing questions are created, adding them to the reward levels is the next important step. Be sure to access each reward level and map the included products. Marketing questions are added by reward level, don't forget to also map any questions you'd like to include.
Setup extras to sell- If you plan to offer global extras (extras accessible to all backers - except No Reward) follow the "Do It" link to access the Extras section of your surveys and add the available products. If you plan to offer custom extras (extras specific to each reward level) then be sure to access each reward level to assign extras. Be sure to click the checkbox once you've completed this step.
Customize your survey colors and image- The standard survey theme image is solid black. This is a great place to upload your logo or an image to help backers associate your campaign with the survey. Add your personal touch by customizing the colors to match your project's theme. Be sure to click the checkbox once you've completed this step.
Review email templates- All projects come with a standard list of email templates that the backers will receive. In this section you can review and edit the text within the emails. Be sure to click the checkbox once you've completed this step.
Add local pickup addresses- If you'll be allowing backers to pickup their pledge products at a local office. Please follow this step to list the available addresses for pickup. If all products are shipped, you can skip this step. Be sure to click the checkbox once you've completed this step.
Review and confirm shipping price selection- If you will be charging shipping for extras, you'll need to decide if you want to bill for shipping by product or by weight. This section will recognize your current selection. Follow this step to change how shipping is billed, this cannot be changed after the surveys have launched. Be sure to click the checkbox once you've completed this step.
Setup pre-orders- Backers who missed the Kickstarter/Indiegogo campaign can still pledge the project as a pre-order if you setup the pre-order page. Easily use your existing reward level and products in this pre-order step. If you do not want to allow more backers to pledge, skip this step by clicking the checkbox.
Setup payment methods- To accept payments during the survey, connect your Stripe account is required. PayPal is optional and can be connected to give backers an alternative payment option.
Review project settings prior to launching- In the project settings you can determine how the backer's data is collected and how accessible you want the survey to be after completion. Some settings cannot be changed after launch. Once you've reviewed the project setting options and made your selections, click the checkbox.
Request launch review- After you've completed all of the steps and please reach out to our support team at [email protected]. Important: Please allow 2-3 business days to complete your review before you plan to launch. Launches take place during business hours (Monday - Friday, 8am - 5pm EST)